NOTE: Changing to DNS Hosting will remove any existing nameservers. There will also be up to 24 hours of propagation time before the new records will reflect once added.
With every domain name registration, VentraIP offers DNS Hosting. This will allow you to manage A, MX, CNAME, TXT, NS, and SRV records of the domain name without the need for a hosting account or a third-party DNS provider. This is especially helpful if you wish to use us for your external DNS hosting or simply want a few records to point to different locations (such as a mail-only domain name).Enabling DNS Hosting on your domain name
To enable your DNS Hosting, please follow these easy steps:- Log in to VIPcontrol
- Click the My Services link on the top → Domain Names from the tabs underneath
- Click the DNS button for the domain name that you wish to edit
- Click the DNS Hosting tab and select Enable.
Adding a new record
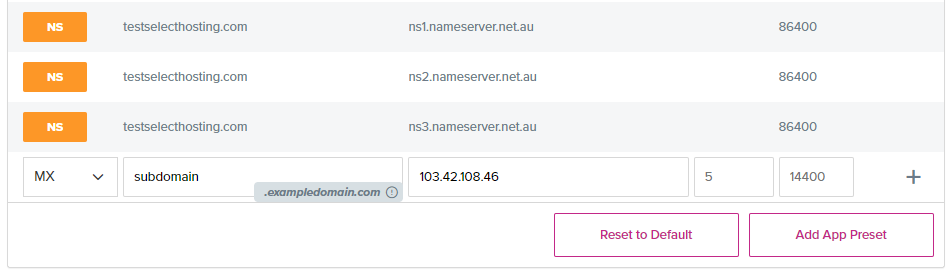
- Click the plus icon to add a new record.
- Type: use the drop-down in the first column to change the type of record (A, MX, TXT, etc).
- Hostname: in the first text field, add the sub-domain this applies to. Leave this blank or enter ”@” to use the root domain.
- Value: in the second text field, enter your “value”. This could be an IP address, a text string, or another domain name.
- Priority: applies to MX type records only. The MX record with the lowest priority number is used first.
- TTL: we recommend leaving this as the default value. This is the “time-to-live” for your DNS record before a DNS server will check the zone again for updated information—measured in seconds.
Changing and removing DNS records
Click the pencil icon to edit an existing one. Click the red x button next to a record to remove it from the zone.
Add a DNS preset
There is also the option to add a preset for third-party apps or hosting. If you select this, you will be given the choice to automatically add the required records for some email hosting providers that you may be using—such as G Suite, Microsoft 365, and our own VentraIP Dedicated Email. Here you can select the offering you need and click Apply DNS Preset to have the MX records automatically added.