Adding or Editing DNS records
- Log in to your cPanel service “Step Two: Access your cPanel to manage your new cPanel web hosting service”.
- Click on the Zone Editor icon.
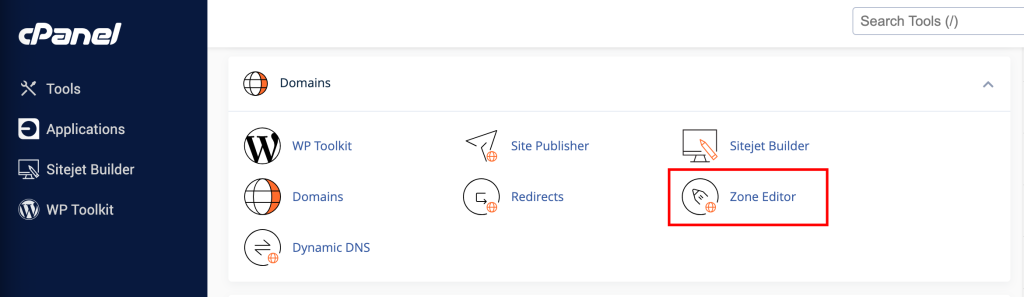
- Here you can quickly add A, CNAME, or MX records. For more options click Manage to the right of the domain you wish to edit.
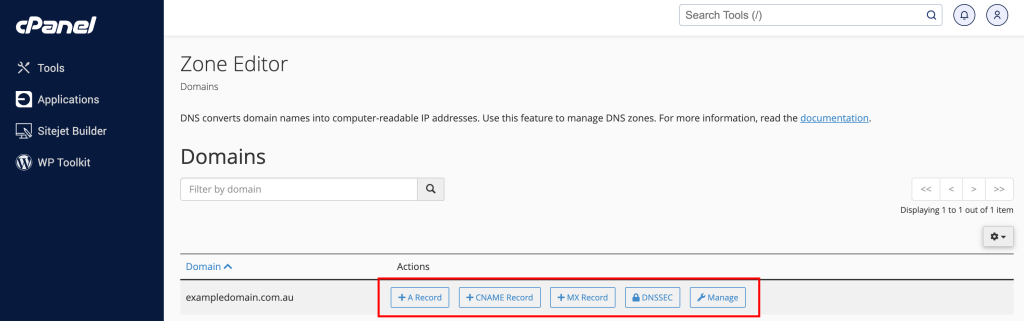
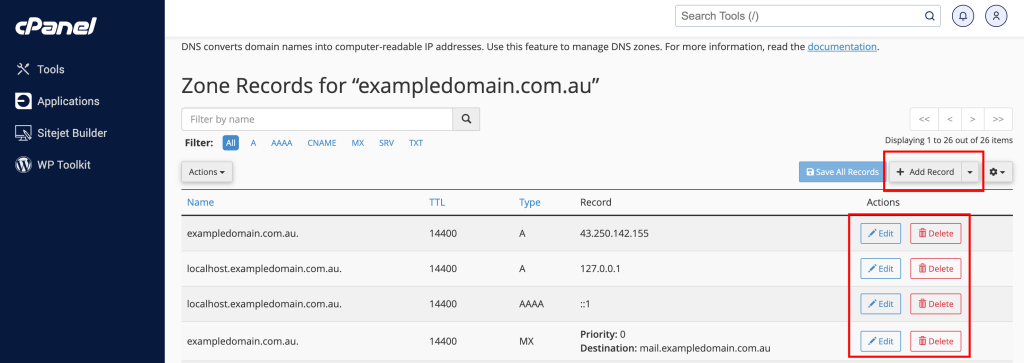
- After you click Manage, you will see your existing DNS Zone information. You can Edit existing records or use the Add Record button to add a new record.
- If you select Add or Edit, you’ll be prompted to complete relevant text fields or drop-down options for the record type and press Save Record.
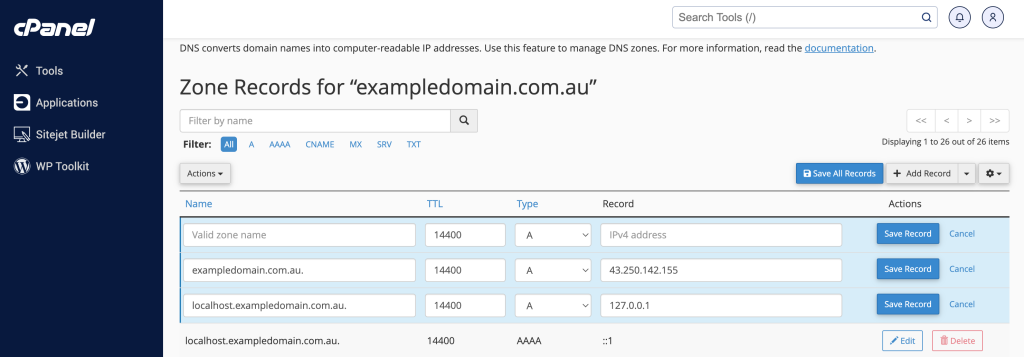
- Set your TTL and record type as required.
- It is recommended to leave the TTL at 14400 unless otherwise specified.
- Enter the destination IP address or hostname accordingly.
- Click Save Record.