Navigating around WHM
After logging in you’ll be on the main interface used with your reseller account. The interface will look as follows: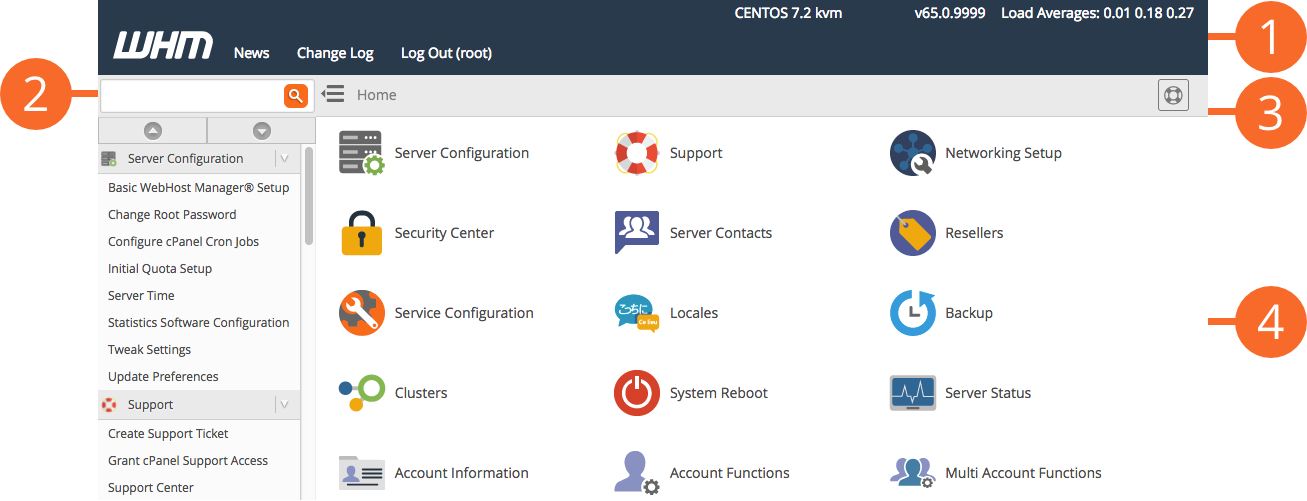 The WHM interface consists of the following sections:
- Top navigation bar
- Side navigation menu
- Support menu
- Features
Top navigation bar
WHM’s top navigation bar remains visible as you navigate throughout the WHM interface.- Click News to view important news and announcements from cPanel, Inc.
- Click Change Logs to view the cPanel & WHM change logs.
- Click Logout to log out of your WHM account.
- Click Load Averages to navigate to WHM’s Process Manager interface (WHM >> Home >> System Health >> Process Manager). The numbers that follow this link represent the server’s one-minute, five-minute, and 15-minute load averages, respectively.
Side navigation menu
The side navigation menu in WHM provides quick access to all of WHM’s interfaces and allows you to quickly search for specific features.- To search for a feature, enter one or more keywords in the text box and click the search icon.
- To quickly navigate to a WHM interface, use the menu of available features.
- To expand or collapse all menu sections with one action, click the expand/collapse arrow icons at the top of each menu, immediately below the search text box.
- To expand or collapse a single menu section, click the arrow icon for that section.
- To access a WHM section, click that section’s name in the menu.
- To access a WHM interface, click that interface’s name in the menu.
- To hide or show the navigation menu, click the collapse icon.
Initial setup/configuration of your reseller account
There are a couple of things you can do to personalize the experience to your liking. We’ll go over them below:Custom Nameservers:
If you intend on setting up your own custom nameservers for your customers to use on their domains to link up with your reseller hosting/VPS service, you’ll need to set them within “Basic WebHost Manager® Setup”. This will mean any account you create will be set up by default to refer to those nameservers. You can find a guide here on setting up your child nameservers, which must be done first!Custom cPanel branding:
The Customization area will allow you to apply your own company name/logo to cPanel accounts in your service. When one of your customers logs in, they’ll see your business name/logo on the header of all pages within cPanel rather than the generic cPanel theme logo.Next, we’ll cover creating new Packages to assign your cPanel accounts a defined set of resources. Click here to go to the next part