Adding the FTP Server
Then follow these steps to create an FTP connection in Dreamweaver:- Open Dreamweaver.
- Connect to your website. In Dreamweaver click Site, then click Manage Sites.
 If you do not already have your site in the list here, add it. In the dialogue box that appears, choose the site you want to upload under Your Sites then click the Edit (pencil icon) below.
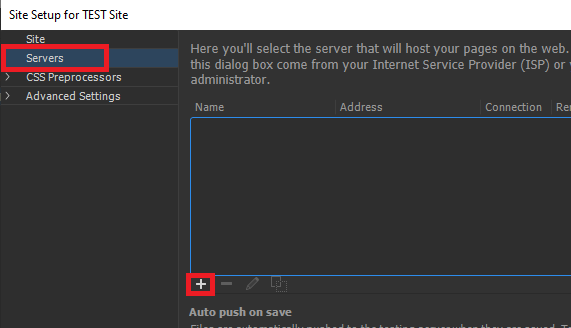
- A dialogue box will appear, this is where you will input your FTP server details:
- Server Name: This can be whatever you like.
- Connect using: FTP over SSL/TLS (explicit encryption).
- FTP Address: This is where you input FTP Hostname you obtained from VIPcontrol.
- Port: 21 (default).
- Username: The FTP Username you obtained from VIPcontrol.
- Password: The FTP Username you obtained from VIPcontrol.
- Click Test, to make sure the details inputted work.
- There are also a few other options available:
- Root Directory:
- Set this to public_html if you’re uploading a website to your primary domain.
- If you’re uploading the website to an addon domain or sub-domain, you need to set this to the folder path for addon/subdomain. (This information can be obtained under cPanel > Domains.)
- Web URL: This will be the URL for your website.
- Authentication: Set to Trusted Server.
- Root Directory:
- Click Save.
Uploading the website
Once you have set up the FTP Server details, uploading the website is fairly straightforward. Just follow these steps:- Click on the Site menu.
- Click Put.
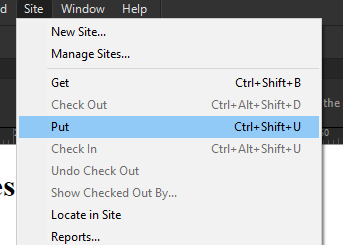
- Click Yes.