Using the MySQL Database Wizard
The wizard will run you through creating both a database and user, linking both and setting permissions:- Log in to your cPanel service “Step Two: Access your cPanel to manage your new cPanel web hosting service”.
- Click the MySQL Database Wizard icon.
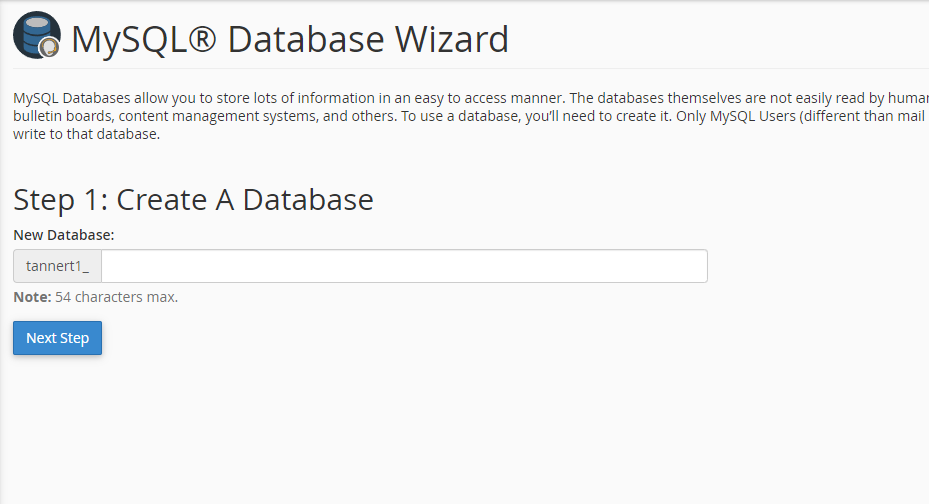
- On Step 1 enter the desired name for your database, then click Next Step.
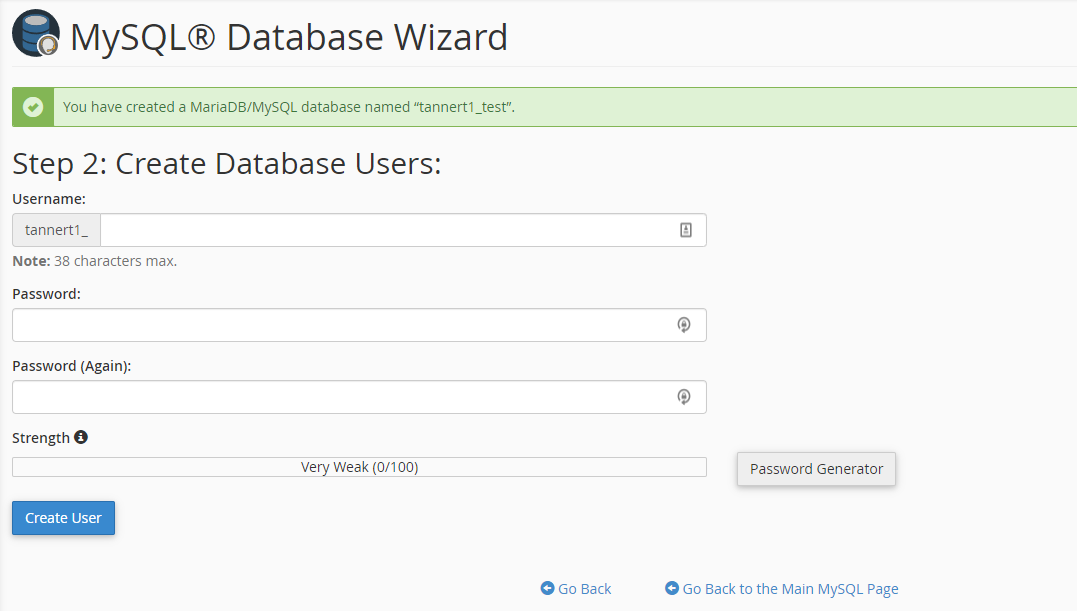
- On Step 2 enter the desired username and password to link to the database, then click Create User.
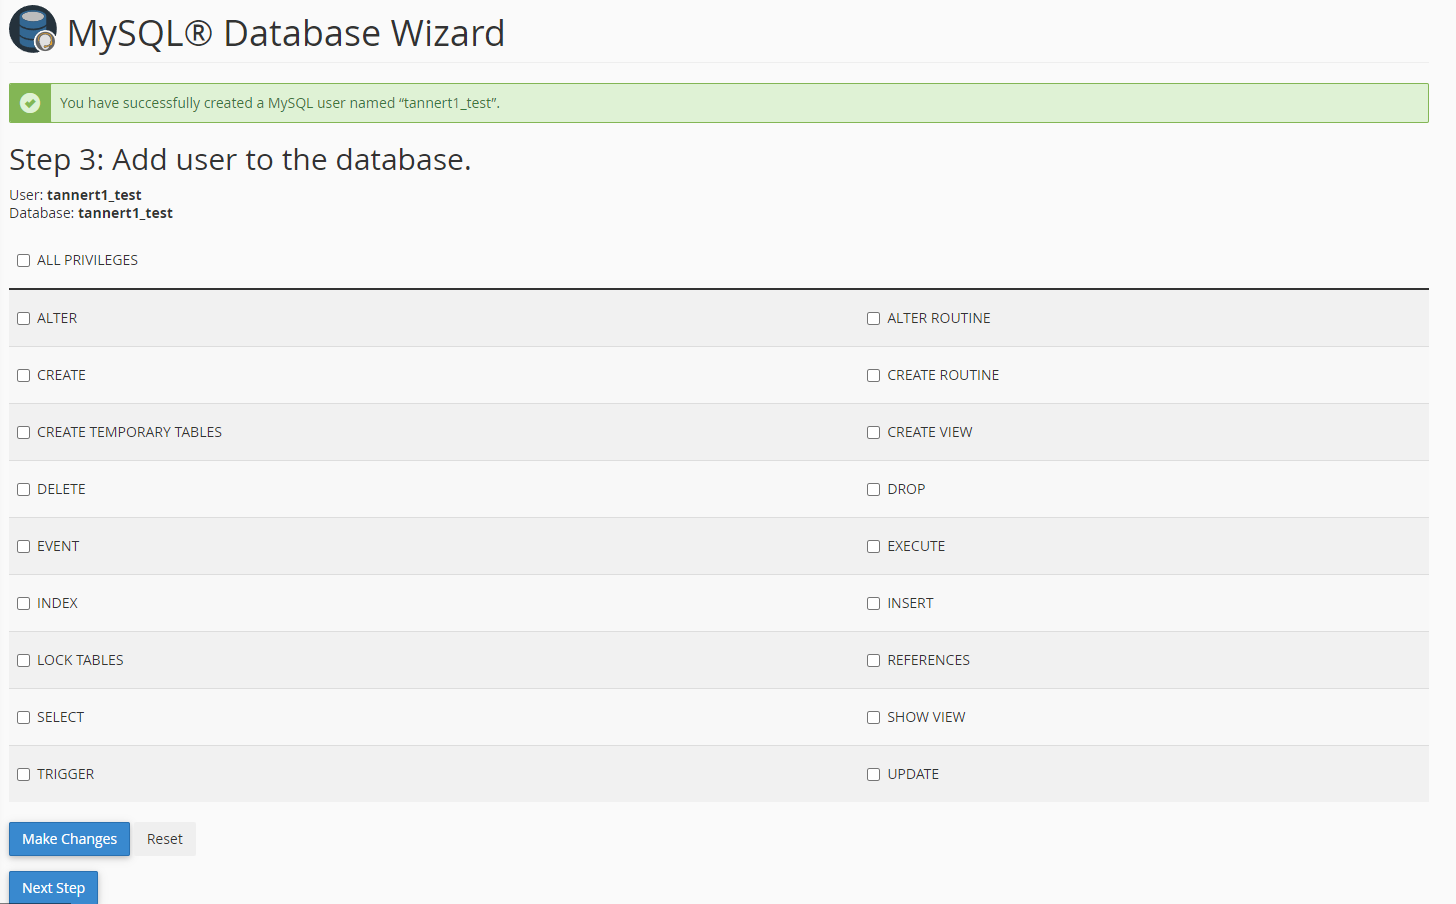
- On Step 3 select the desired privileges for the user on the database, this determines how the database may be managed, then click Next Step.
- On Step 1 enter the desired name for your database, then click Next Step.
 You can then use the MySQL database and linked user within your favourite script platform (such as WordPress or Joomla) to install it.
Creating a database from the MySQL Databases section of cPanel
Using the MySQL Databases section is a little less straightforward, but it provides more freedom by allowing you to link additional users to a database (allowing multiple).- Log in to your cPanel service “Step Two: Access your cPanel to manage your new cPanel web hosting service”.
- Click the MySQL Databases icon.
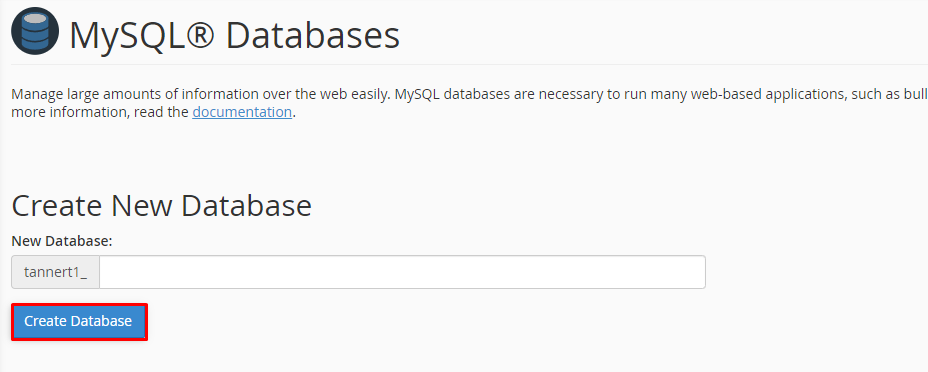
- Under Create New Database you may enter your desired database name.
- Click Create Database.
- Your new database will then be created and the screen will confirm its success.
- Click Go Back to return to the MySQL Databases section of cPanel.
- Click Create Database.
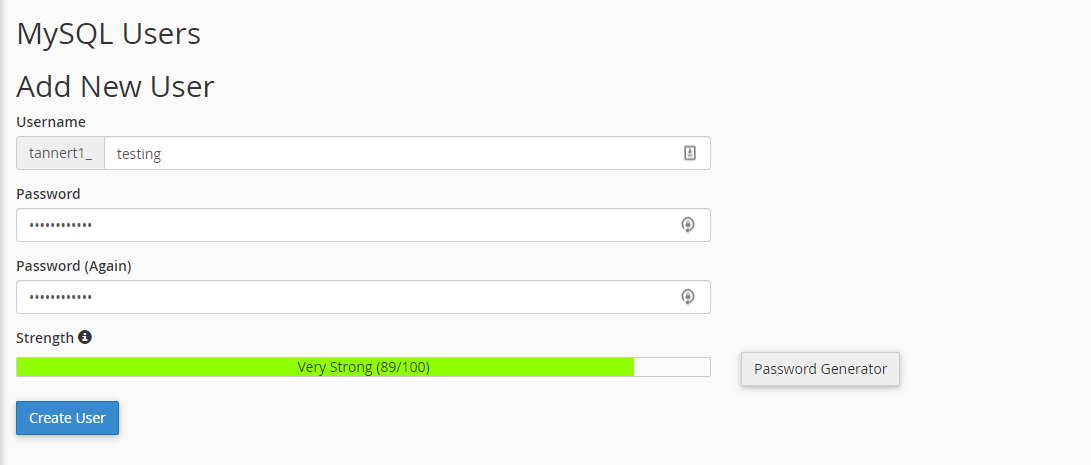
- Under MySQL Users → Add New User, enter your new database username/password.
- Then, click Create User.
- Your new database user will then be created.
- Click Go Back to return to the MySQL Databases section of cPanel.
- Then, click Create User.
- To then link your new database and user go to Add User To Database.
- Select a user from the drop-down menu.
- Select a database from the drop-down menu.
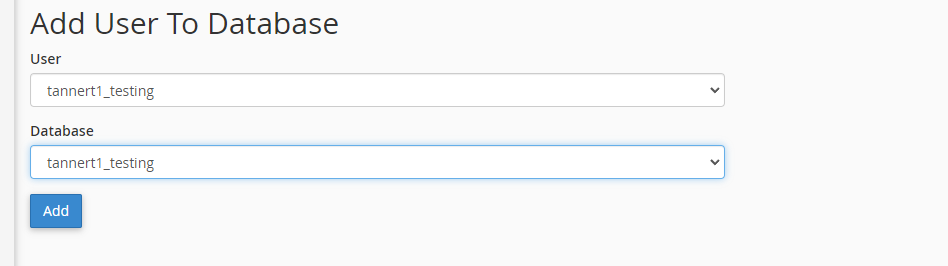
- Click Add, then on the next page select the privileges to grant. If you’re not sure, select all privileges.
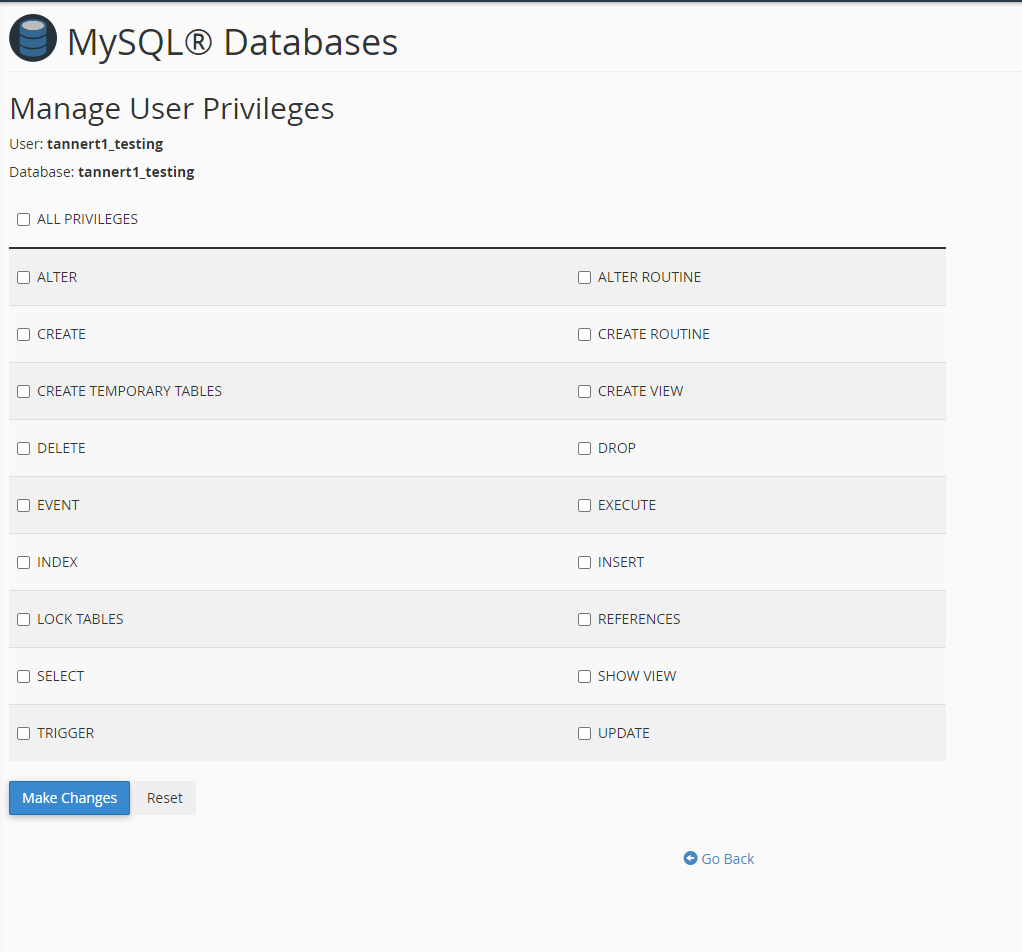
- Click Make Changes to confirm.