Setting up your VNC client & Retrieving your VNC access details
- First up, you’re going to need a VNC viewer.
- There are a number of VNC viewers you could use; our team in the office tend to use TightVNC or VNC Viewer, which are both free to use!
- Install the viewer of your choice, and it will be ready for your VNC access details.
- Retrieving your VNC access details for your self-managed VPS with VentraIP can easily be done through your VIPcontrol account.
- Navigate to VIPcontrol >> My Services >> VPS >> You will be able to then click on “VNC Access” on the left-hand side of the VPS management page, as you can see attached below:
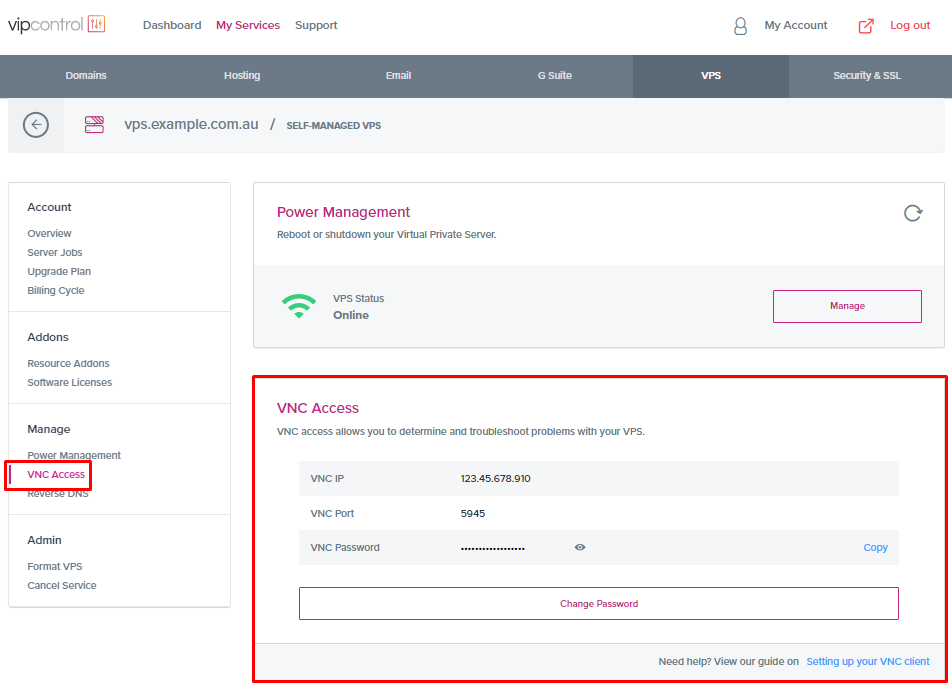
- Navigate to VIPcontrol >> My Services >> VPS >> You will be able to then click on “VNC Access” on the left-hand side of the VPS management page, as you can see attached below:
- Now that you have your VNC Viewer ready and your VNC access details on hand, you can now enter your details into your VNC Viewer accordingly.
- In our screenshot below, we are using TightVNC. Note, when asked for a “Remote Host” or “VNC Server address,” enter your VNC IP address followed by two colons and your VNC port number, as seen below:

- In our screenshot below, we are using TightVNC. Note, when asked for a “Remote Host” or “VNC Server address,” enter your VNC IP address followed by two colons and your VNC port number, as seen below:
- Once you’ve clicked connect, the next step would be to enter your VNC Password, which will in effect grant you access and control of your server via VNC.